
There’s something magical about the gentle sound of water trickling in your own backyard. It softens the noise of everyday life, washes away stress, and instantly turns an ordinary garden into a little sanctuary.
An outdoor fountain isn’t just décor it’s a feeling, a moment of peace, and a touch of beauty that welcomes you every time you step outside.
Step 1: Choose the Right Location
The first step in installing your outdoor fountain is to decide where it should be placed. The location matters for both aesthetic and practical reasons.
Ideally, you want a place that is visible from your home so you can enjoy the sight and sound of the water even when you are indoors. It should also be easily accessible for maintenance. Consider areas that get partial sunlight, since too much sun can encourage algae growth while too much shade might keep the water too cool for certain aquatic plants.
If your fountain requires electricity, choose a location near an outdoor outlet or plan for an extension cord rated for outdoor use. If you are installing a solar fountain pump, select a spot that receives direct sunlight for most of the day to ensure optimal performance.
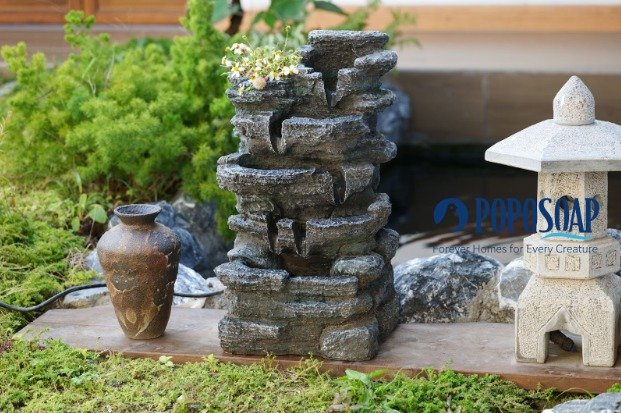
Step 2: Select the Right Type of Fountain
There are many different fountain styles available, and the type you choose will determine the complexity of the installation. Common options include:
- Self-contained fountains – These have an internal reservoir and pump, making them easier to install.
- Pond fountains – These require a pond or water basin and are often larger.
- Wall-mounted fountains – These attach to a vertical surface and can be perfect for smaller spaces.
If you want an eco-friendly and cost-effective option, a solar powered water fountain or a solar powered water pump can operate without increasing your electricity bill. These are ideal for sunny gardens and come in various designs to match your outdoor decor.
Step 3: Prepare the Foundation
A stable foundation is essential for your fountain to work properly and last for years. Uneven ground can cause water to spill out and place strain on the pump.
For most freestanding fountains, you will need to level the ground and place a concrete or stone pad where the fountain will sit. Use a level tool to ensure that the base is perfectly flat. For wall-mounted fountains, make sure the wall is strong enough to support the weight of the fountain when filled with water.
If you are installing a pond-based feature such as a solar powered pond fountain, you will need to dig a hole for the basin or pond liner. Ensure that the liner fits snugly and is free from sharp rocks that could cause damage.
Step 4: Assemble the Fountain
Follow the manufacturer’s instructions carefully when assembling your fountain. This typically involves stacking tiers or placing decorative elements in their correct positions. For multi-tier designs, make sure each layer is secure to prevent shifting when water flows.
Next, install the pump. The pump is the heart of the fountain, circulating water from the reservoir back to the top of the fountain. Whether you are using a traditional electric pump or a solar-powered option, make sure the pump is placed securely at the bottom of the basin and fully submerged in water.
If you are incorporating additional decorative features, such as a solar bird bath fountain or a bird bath fountain, position them before filling the fountain so you can hide wires or tubing neatly.
Step 5: Connect the Pump and Power Supply
If you are using an electric pump, plug it into a ground fault circuit interrupter (GFCI) outlet for safety. Make sure any cords are rated for outdoor use and hidden to avoid tripping hazards.
For solar fountains, position the solar panel in a sunny location and connect it to the pump using the provided cable. For a solar powered bird bath fountain, this might mean placing the solar panel close to the bird bath so it can run efficiently throughout the day.
Some pumps allow you to adjust the water flow, so experiment until you find the perfect balance between sound and splash.
Step 6: Fill the Fountain with Water
Once the pump is connected, fill the basin or reservoir with clean water. Avoid using chemically treated water if you plan to attract birds or keep aquatic plants, as chlorine and other additives can be harmful.
When filling, leave about an inch of space at the top to prevent splashing over. Once the fountain is running, you may need to add more water to compensate for air pockets in the pump or tubing.
Step 7: Test and Adjust the Flow
Turn on the pump and watch the water flow through the fountain. Check for leaks, splashes, or uneven flow. If the water splashes outside the basin, adjust the pump speed or reposition the fountain parts to contain the flow better.
If you notice low water pressure, make sure there are no blockages in the tubing and that the pump is fully submerged. For a solar powered bird bath fountain, performance may vary depending on sunlight conditions, so be patient and adjust the solar panel position as needed.
Step 8: Add Decorative Elements
This is where you can truly personalize your outdoor fountain. Surround the base with plants, decorative stones, or garden ornaments. Aquatic plants like water lilies or floating hyacinths can add natural beauty to a pond fountain, while LED lights can create a magical glow in the evenings.
For bird lovers, adding a solar bird bath fountain can provide fresh water for your feathered visitors while enhancing the visual appeal of your garden.
Read Also: The Ultimate Guide to Home Service Massage for Men
Step 9: Maintain Your Fountain
To keep your fountain looking beautiful and running smoothly, regular maintenance is necessary.
- Check water levels regularly, especially during hot weather, as evaporation can lower the water level quickly.
- Clean the pump to prevent clogs from debris, algae, or mineral buildup.
- Change the water periodically to keep it fresh and clear.
- For features like a solar-powered bird bath fountain, wipe the solar panel regularly to ensure it absorbs sunlight efficiently.
During the winter months in colder climates, it is best to drain the fountain and store the pump indoors to prevent damage from freezing temperatures.
Benefits of Installing an Outdoor Fountain
Aside from the obvious beauty an outdoor fountain brings, there are many benefits to having one in your garden:
- Stress relief – The sound of flowing water is naturally calming and can help reduce stress.
- Wildlife attraction – Birds, butterflies, and beneficial insects are drawn to moving water sources.
- Property value – A well-maintained fountain can increase the visual appeal and overall value of your home.
- Eco-friendly options – Choosing features like solar fountains helps conserve energy and reduce costs.

Final Thoughts
Installing an outdoor fountain is a rewarding project that transforms your garden into a peaceful retreat. By following these steps, you can enjoy the beauty of flowing water without the need for professional installation. Whether you choose a traditional electric model or opt for a green solution like a solar powered water pump, your new fountain will provide beauty, relaxation, and enjoyment for years to come.